I have a Clarke CMD300 Milling machine, which is based on a Sieg X2 I believe.
When I first bought the machine I made an LED lighting board which was "fixed" to the mill in a rather haphazard manner. The board used 5mm LED's which were hot glued into a perspex panel which was then attached to the holes on the front of the mill which were originally used for the sliding guard.
A little while ago I bought an AdaFruit NeoPixel ring to play with. While playing I had the thought that it might make a good light for the mill. It was extremely bright and, of course, circular. The inner diameter was sufficiently larger than the quill on the mill to ensure adequate clearance. So I attached it to an Arduino Uno and a rotary encoder, wrote some code to allow the brightness to be varied.
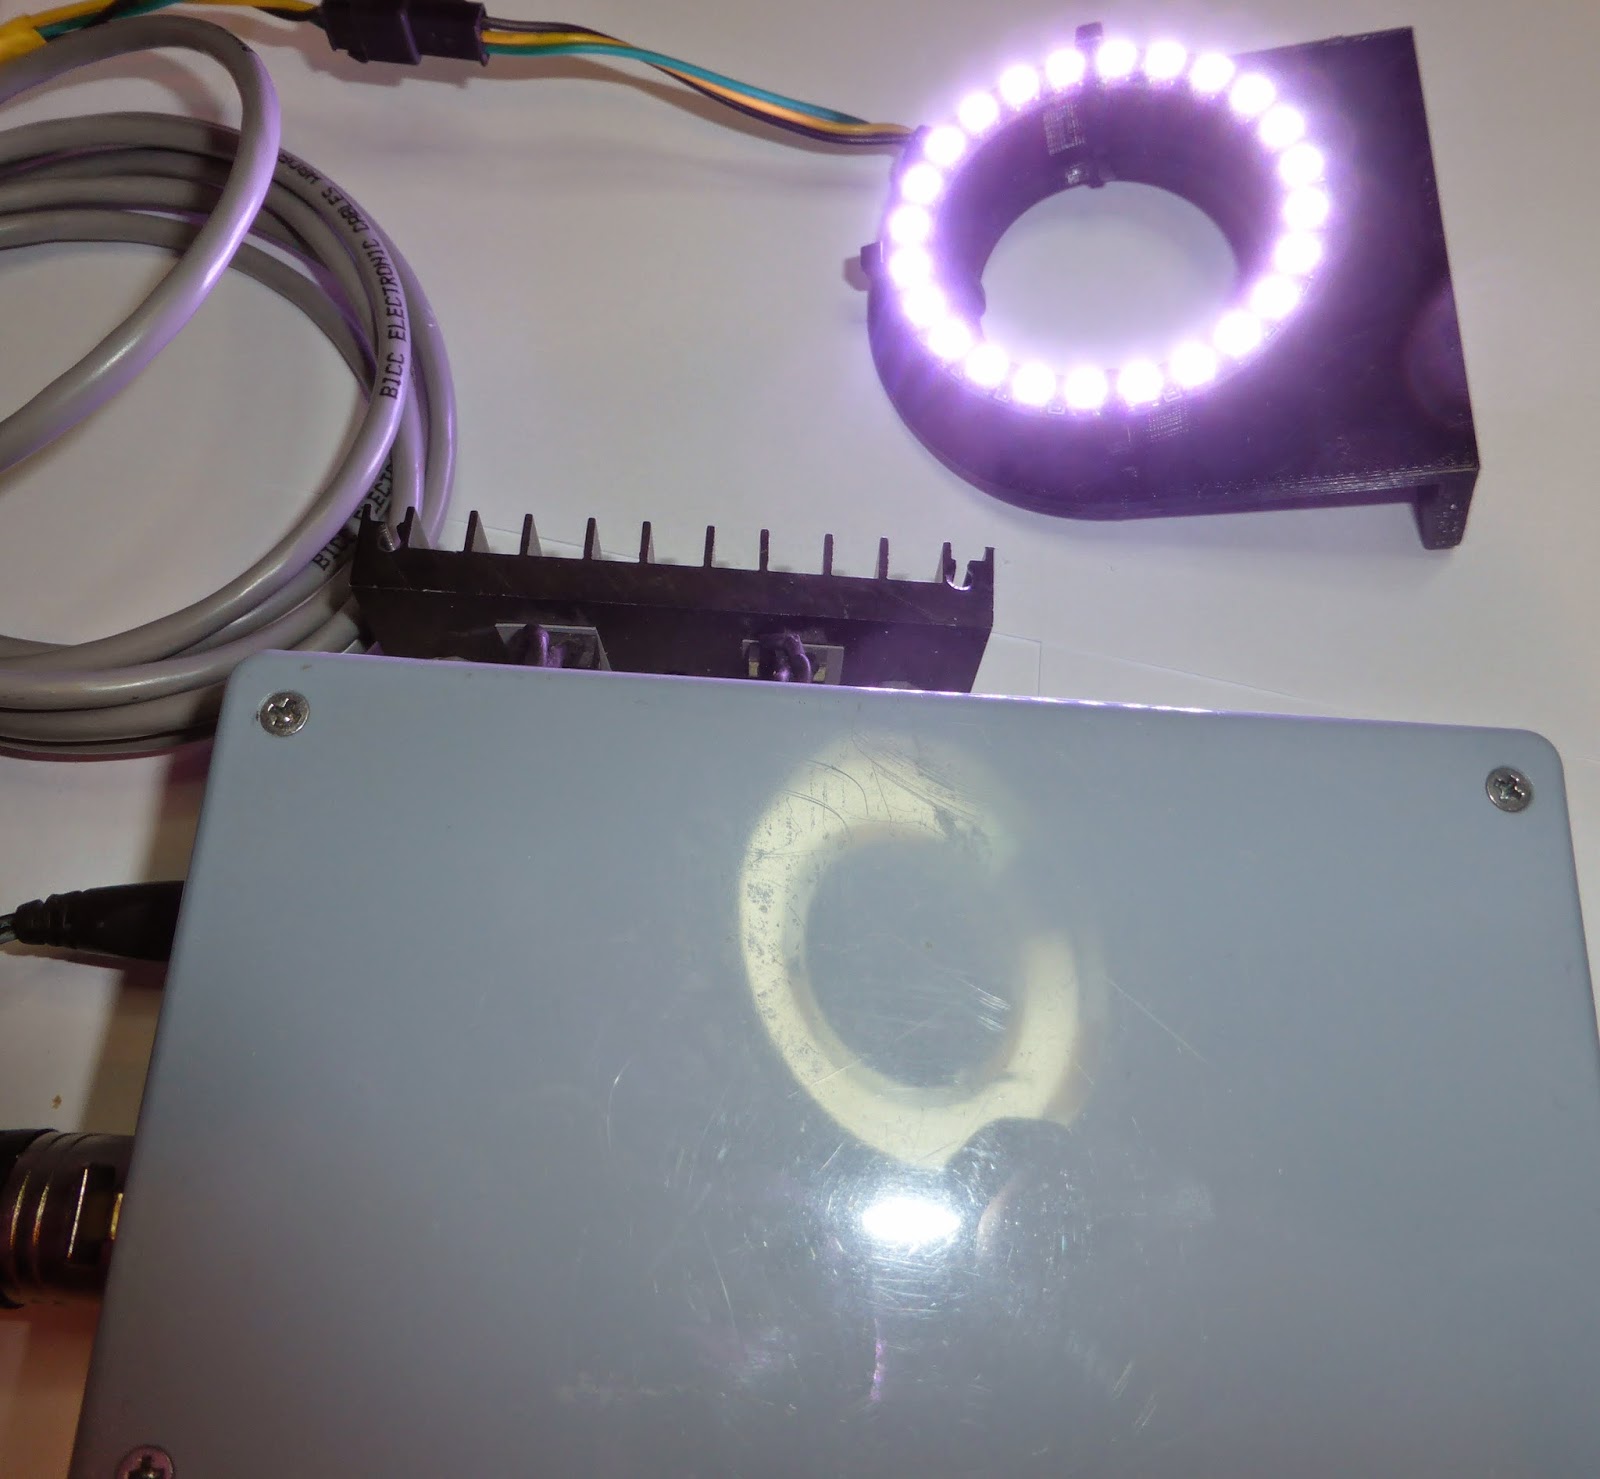
I didn't really want to use a whole Arduino Uno for the project so I put a simple ATMega 328 based circuit together on some strip board along with a dual power supply (one 5V channel to power the circuit and a separate 5V channel dedicated to powering the NeoPixel ring. I put this altogether in a project box I had laying around.
Interior view of control box
As can be seen i have mounted the voltage regulators for each of the 5V rails on an external heatsink, which I recovered from a defunct UPS! I added a power connector for an external 2A power adaptor, a power switch, power LED and XLR socket for connection to the NeoPixel ring.
The rotary encoder I use includes a decoder which takes away the grief usually involved in rotary encoders and was purchased from
Spriatronics. I got the NeoPixel ring from
PiMoroni. NOTE I have no affiliation with either! The Arduino library I for the NeoPixel used can be found here. I realize that I could have done this with a number f LED's and a potentiometer and that my solution was overkill but the end result is extremely bright and controllable and the all in cost was around £35 which seemed reasonable to me. And let's not forget it was a project as much for the sake of it, it just turned out to be a very useful and practical project - result!
Front, side and rear views
The code to control the NeoPixel ring is very easy thanks to the Arduino library provided by AdaFruit.
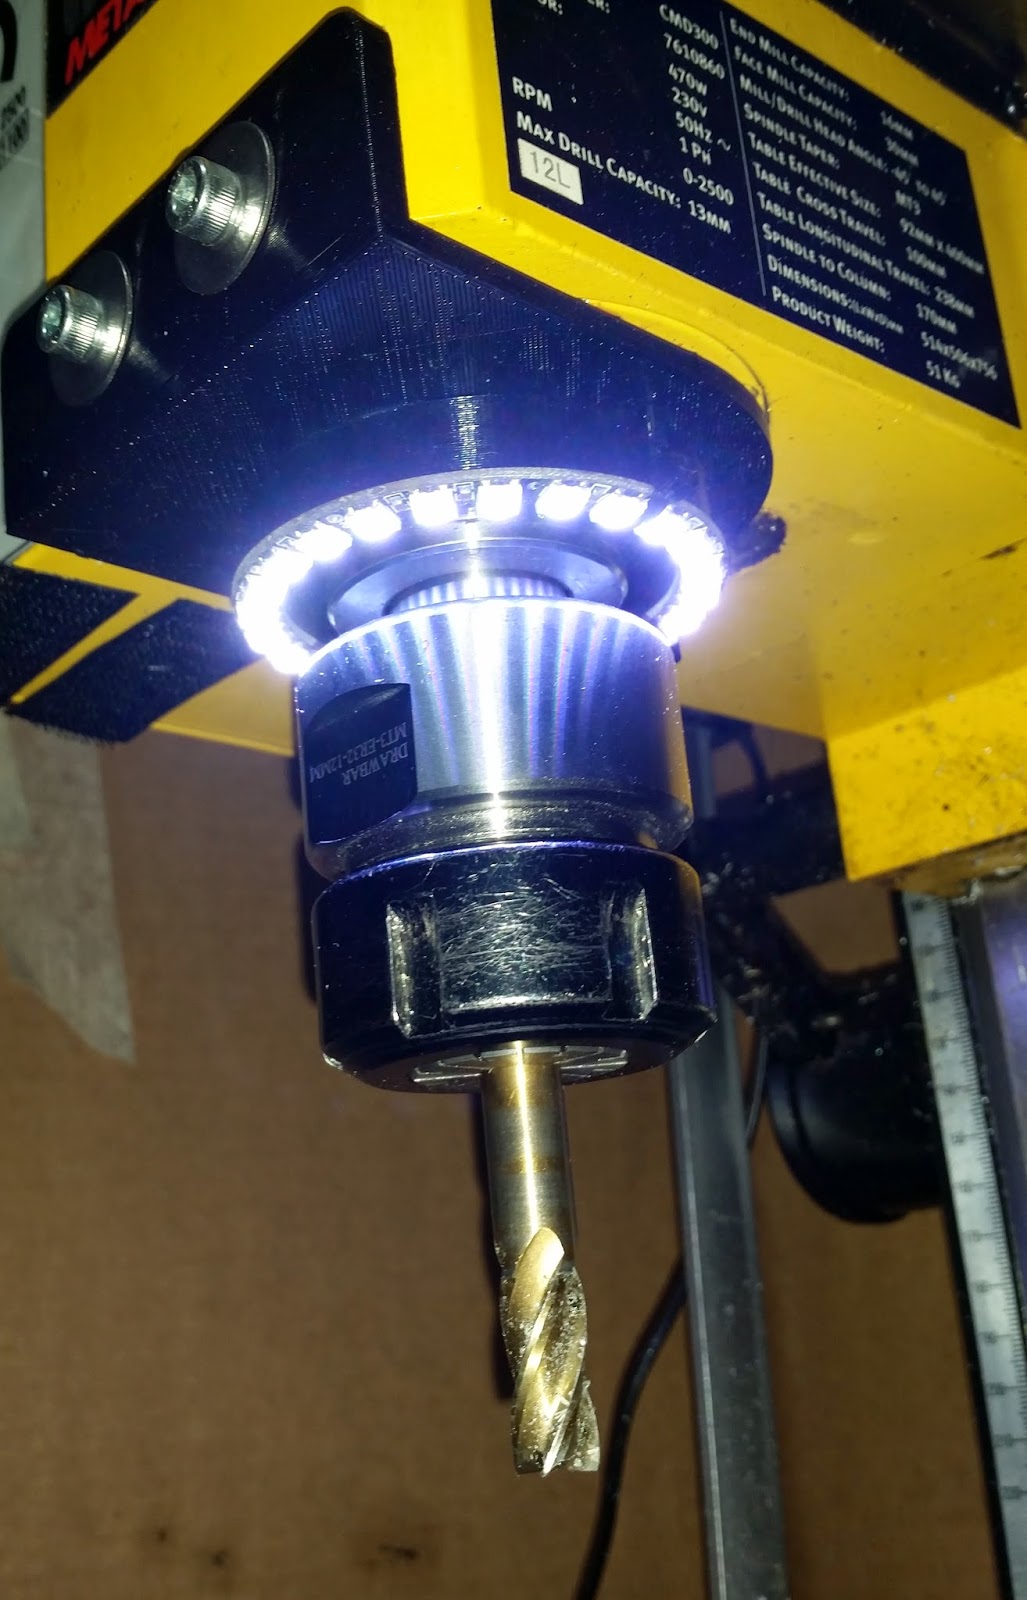
The next thing I had to resolve was how to mount the ring on the mill itself. I have just had a 3D printer for my birthday so I designed a bracket and a spacer in Autodesk 123D Design, printed them and attached the NeoPixel ring to them both using cable ties.
Views of the 3D printed bracket and the light working.
Installed and running. And it is very good!
Arduino code:
--------------------------------------------------------
#include <Adafruit_NeoPixel.h>
#define PIN_NEOPIXEL 5
#define PIN_ENCODER_SI 3
#define PIN_ENCODER_DI 4
#define PIN_ENCODER_SW 2
int __EncoderPosition = 255;
boolean __EncoderChanged = false;
boolean __FullOn = true;
Adafruit_NeoPixel strip = Adafruit_NeoPixel(24, PIN_NEOPIXEL, NEO_GRB + NEO_KHZ800);
void setup(void)
{
strip.begin();
strip.show(); // Initialize all pixels to 'off'
Serial.begin(9600);
Serial.println("Started!");
pinMode(PIN_ENCODER_SI, INPUT);
pinMode(PIN_ENCODER_DI, INPUT);
pinMode(PIN_ENCODER_SW, INPUT);
pinMode(PIN_NEOPIXEL, OUTPUT);
//pull ups
digitalWrite(PIN_ENCODER_SI, HIGH);
digitalWrite(PIN_ENCODER_DI, HIGH);
digitalWrite(PIN_ENCODER_SW, HIGH);
strip.begin();
for(uint16_t i=0; i<strip.numPixels(); i++) {
strip.setPixelColor(i, 255, 255, 255);
}
strip.setBrightness(255);
strip.show();
attachInterrupt(0, Encoder_Turn, RISING);
attachInterrupt(1, Encoder_Switch, RISING);
}
void loop(void)
{
//if ( __EncoderChanged == true) {
__EncoderChanged = false;
for(uint16_t i=0; i<strip.numPixels(); i++) {
strip.setPixelColor(i, 255, 255, 255);
}
strip.setBrightness(__EncoderPosition);
strip.show();
//}
Serial.print(__EncoderPosition);
Serial.print(", ");
Serial.print(__EncoderChanged);
Serial.print(", ");
Serial.println(__FullOn);
}
void Encoder_Turn(void)
{
int _Direction = digitalRead(PIN_ENCODER_DI);
__EncoderChanged = true;
switch (_Direction)
{
case LOW:
__EncoderPosition -= 5;
break;
case HIGH:
__EncoderPosition += 5;
break;
}
if (__EncoderPosition > 255)
__EncoderPosition = 255;
if (__EncoderPosition < 0)
__EncoderPosition = 0;
}
void Encoder_Switch(void)
{
detachInterrupt(1);
if (__FullOn){
__EncoderPosition = 0;
__FullOn = false;
} else {
__EncoderPosition = 255;
__FullOn = true;
}
attachInterrupt(1, Encoder_Switch, RISING);
__EncoderChanged = true;
delay(100);
}
--------------------------------------------------------